
For bike parks, shuttle laps, and steep technical descents, the right downhill cycling helmet starts with certification, followed by a secure fit and practical comfort features. A lightweight or expensive full-face helmet is not automatically the safest choice; it should be tested for the impacts associated with downhill riding and remain stable with your goggles, protective pads, and riding position. When two models fit equally well, choose the one with the clearer downhill certification.
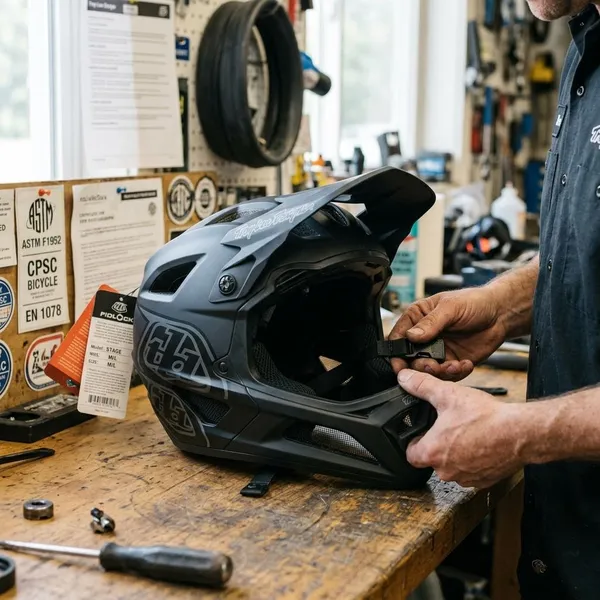
Safety standards to check on a downhill helmet
Start with the safety labels before comparing vents, colors, visor shape, or weight. For U.S. riders, CPSC compliance is the basic bicycle requirement, while ASTM F1952 is the standard to look for when the helmet is meant for true downhill or gravity use.
ASTM F1952 for downhill riding
ASTM F1952 is the label I would look for first if the helmet is going to see lift-served park days, downhill tracks, jump lines, or repeated high-speed descents. It is aimed at downhill mountain bike use, not just general trail riding with a full-face shape.
- Best sign: the product page clearly lists ASTM F1952.
- Good use case: bike parks, racing, shuttles, steep rocky trails.
- Be careful with: "DH-style" or "enduro full-face" wording without the actual standard.
- Check the label: look inside the helmet or on the manufacturer's specs, not only in marketplace titles.
A lightweight full-face can still be a good helmet, but without a downhill-specific rating it may be better suited to enduro or trail riding than full days of rough park laps.
CPSC compliance for U.S. bicycle use
CPSC is the baseline for bicycle helmets sold for use in the United States. If a helmet is being sold as a bicycle helmet but the listing does not clearly mention CPSC compliance, treat that as a reason to slow down and verify it through the brand.
For downhill riding, CPSC alone should not be your only filter. A sensible shortlist is: bicycle-compliant first, then downhill-rated if you are riding terrain where a crash is more likely to involve speed, rocks, jumps, or repeated impacts over a season.
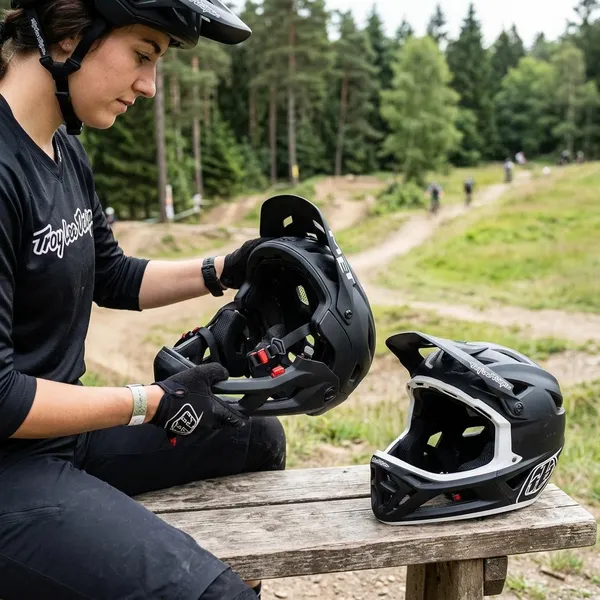
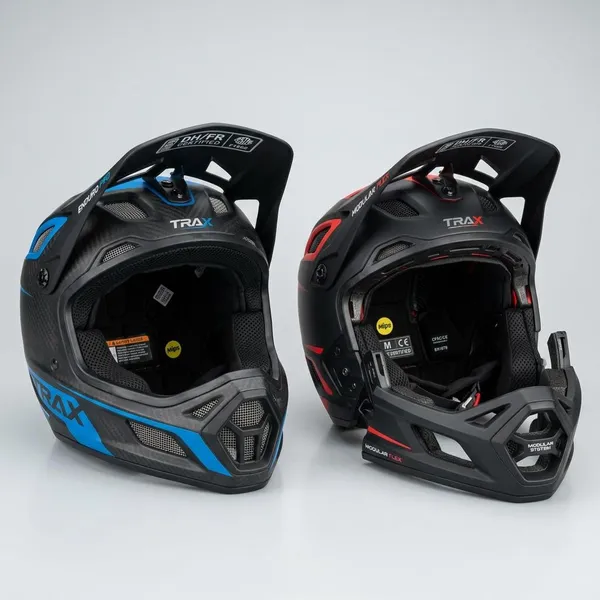
Fixed or removable chin bar?
The chin bar decision is mostly about how honest you are with your riding. If the helmet is for dedicated gravity days, a fixed full-face is usually the cleaner choice. If you pedal a lot and only occasionally need more face coverage, a removable chin bar can make sense, but only if the helmet is rated for the riding you plan to do.
| Riding situation | Better direction |
|---|---|
| Lift-served bike park every weekend | Fixed full-face |
| Enduro rides with long climbs and hard descents | Convertible, if properly certified |
| Downhill racing or rough jump lines | Fixed full-face |
| One helmet for trail and occasional park use | Removable chin bar, with careful checks |
Fixed chin bars for a dedicated full-face setup
A fixed chin bar is the straightforward option for bike park laps, downhill racing, shuttle runs, and steep trails where you know you want full-face coverage from start to finish. There is no attachment mechanism to install, forget, or second-guess before a run.
The trade-off is heat and bulk. On a hot summer pedal ride, a dedicated downhill helmet can feel like too much helmet; on a lift-accessed day where you are mostly descending, that same solid feel is usually worth it.
Removable chin bars for convertible use
A removable chin bar works best for riders who split time between trail riding and occasional gravity use. The practical test is simple: would you actually stop, attach the chin bar properly, and inspect it before the descent that matters?
- Check the rating: do not assume every convertible helmet is downhill-certified.
- Practice the attachment: it should lock in clearly and be easy to inspect.
- Think about habits: if the chin bar stays in the car, it is not protecting you.
For occasional park trips, a certified convertible can be a smart compromise. For regular downhill days or racing, I would lean toward a dedicated fixed full-face unless you have a strong reason not to.
How a downhill full-face helmet should fit
Fit is where many good helmets become bad choices. A downhill full-face helmet should feel firm and secure around the head and cheeks without creating sharp pressure points, and it should stay put when the strap is fastened.
A useful priority order is: measure first, check head shape, confirm cheek support, test movement, then try the helmet with goggles and a neck brace if you use one.
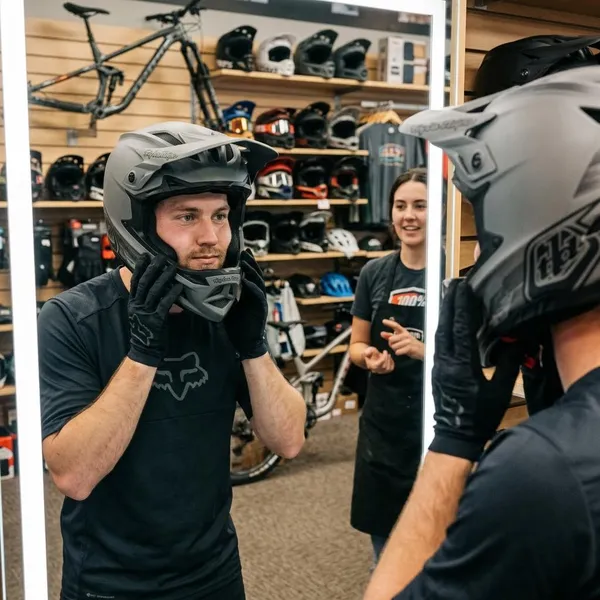
Measure your head and check the size chart
Use a soft tape measure around the widest part of your head, usually just above the eyebrows and ears, then compare that number with the specific brand's size chart. Do not rely on your usual helmet size, because full-face shells and internal shapes vary a lot between brands.
If you are between sizes, do not automatically size up for comfort. A slightly snug liner may break in, but a helmet that already moves around in the shop is unlikely to become safer on the trail.
Check for even contact without pressure points
The helmet should touch evenly around your head, not clamp one spot while leaving space somewhere else. Wear it for 10 to 15 minutes if you can, because forehead and temple pressure often shows up after the quick "this seems fine" moment.
- Bad sign: sharp temple or forehead pressure.
- Bad sign: gaps along the side of the head.
- Bad sign: the helmet rocks before the liner grips.
- Good sign: firm contact that stays comfortable as you move.
Check cheek pad fit
Cheek pads should press firmly enough to keep the helmet centered, but not so hard that you feel jaw pain or struggle to breathe naturally. New full-face cheek pads can feel snug at first, so focus on support rather than softness.
If the helmet fits your skull well but the face area feels slightly off, check whether the brand offers different cheek pad thicknesses. That small adjustment can be the difference between a helmet you tolerate and one you can wear for a full park day.
Fasten the strap and test for movement
Buckle the strap, grab the chin bar, and gently move the helmet up, down, and side to side. Your skin should move with the liner more than the helmet moves independently.
- Look down and shake your head lightly.
- Turn your head quickly left and right.
- Push the rear of the helmet forward.
- Try to roll the helmet off from the back.
If it slides easily, the strap is not the fix. The size, shell shape, or padding setup is wrong for you.
Try it with your goggles and neck brace
Test the helmet with the gear you actually ride in. Goggles should sit cleanly in the eye port without pushing the helmet upward, blocking peripheral vision, or creating a distracting gap at the brow.
If you wear a neck brace, get into a riding position and check whether the lower rear edge of the helmet constantly hits the brace. A little contact can be normal, but repeated interference on steep terrain is annoying enough that you may stop wearing the setup properly.
- Goggles: stable strap, clear vision, no nose pressure.
- Visor: enough adjustment for bright park days.
- Neck brace: no constant restriction when looking ahead.
Conclusion
Choose the helmet by filtering in the right order: downhill-relevant certification, secure fit, then the features that make it comfortable enough to wear every run. A fixed full-face is the safer default for regular park or race use, while a certified convertible can work for riders who genuinely split time between climbing and descending. The helmet that fits your head, works with your goggles, and matches your real riding is the one most likely to stay on your head when it counts.