A cycling helmet mirror is worth considering if you often ride near traffic and want earlier warning of what is coming up behind you. It is not a substitute for a shoulder check, but it can make lane positioning, overtakes, and busy commutes feel less like guesswork. The main questions are whether your helmet can hold one securely and whether you are willing to spend a few rides getting used to the small moving view.
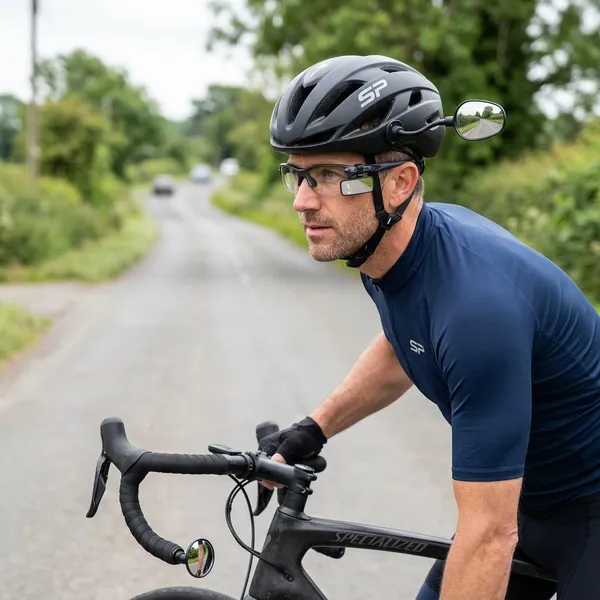
Helmet mirror vs handlebar mirror vs glasses mirror
The best mirror style depends less on which one looks clever and more on how you actually ride. A daily commuter riding in traffic may value a head-following view, while a casual path rider may prefer the simpler glance of a handlebar mirror.
Rear view and aiming
A helmet mirror gives you a rear view that moves with your head, so small head turns can help you scan behind and slightly beside you. That is useful on roads where traffic approaches from different angles, but it also means the image takes practice to interpret.
A handlebar mirror is usually easier on day one because the view stays fixed to the bike. A glasses mirror behaves more like a helmet mirror, but its aim can change if your glasses slide, sit crooked, or get bumped when you remove them.
- Choose helmet-mounted if you want the view to follow your head.
- Choose handlebar-mounted if you want the easiest learning curve.
- Choose glasses-mounted only if your eyewear sits very consistently.
Stability on rough roads
Rough pavement changes the comparison. A handlebar mirror can blur when the bike shakes, especially if it has a long arm or a flexible mount. A helmet mirror may stay surprisingly readable because your head absorbs some vibration, but only if the mount is firm and the arm does not wobble.
For smooth city lanes or paved bike paths, almost any decent mirror can work. For chip seal, potholes, gravel shoulders, or winter-damaged roads, stability should move higher on your priority list than mirror size.
Mounting and compatibility
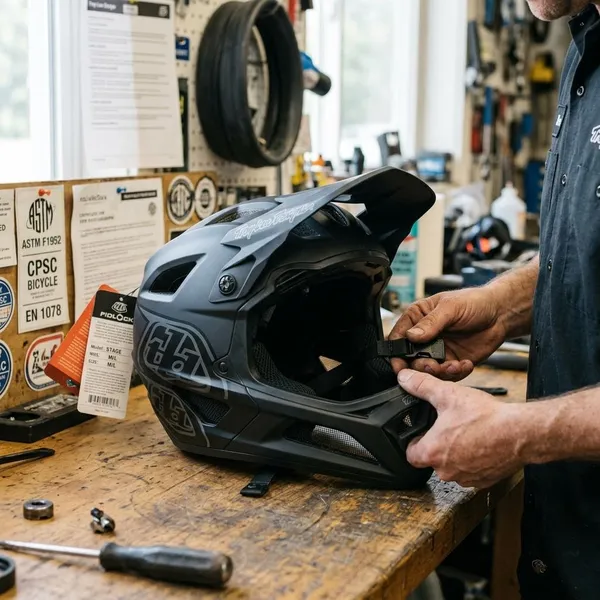
Compatibility is the first thing to check before buying. A helmet mirror needs a suitable place on the helmet shell or vent area, depending on the mount design. Deep vents, sharp ribs, textured plastic, or very curved shells can make some adhesive or clip mounts unreliable.
A handlebar mirror has its own limits: drop bars, crowded cockpits, lights, computers, bells, and bar-end plugs can all get in the way. A glasses mirror depends on the thickness and shape of your frame arms.
- Helmet shape: look for a stable mounting surface or compatible vent layout.
- Mount type: adhesive, clip, strap, and clamp designs are not interchangeable.
- Riding setup: consider lights, glasses, helmet vents, and storage habits.
- Switching gear: one helmet is simpler than rotating between several helmets.
Comfort and ease of use
A helmet mirror adds a small object near your face, not a lot of weight. Some riders forget it after ten minutes; others find the mirror sitting in their peripheral vision annoying. If you are sensitive to visual distractions, try to test one in a quiet area before relying on it in traffic.
For long-term commuting, convenience matters. A mirror fixed to the helmet you wear every day is easy to live with. If you regularly swap between a road helmet, commuter helmet, and winter helmet, a bike-mounted mirror or a transferable design may be less frustrating.

How to attach and adjust a cycling helmet mirror
Good setup matters more than most riders expect. A slightly loose or badly aimed mirror is not just less helpful; it can become something you keep fiddling with when your attention should be on the road.
Check both manufacturers' mounting instructions
Read the helmet instructions and the mirror instructions before attaching anything. Some helmet makers warn against adhesives, drilling, covering vents, or attaching accessories to certain areas. Mirror brands may also specify surface shape, cleaning steps, curing time, or left/right mounting limits.
If the two sets of instructions conflict, do not improvise with tape, glue, or zip ties and call it good. A mount that looks fine at home can fail once heat, sweat, vibration, and helmet storage get involved.
Fit the helmet before positioning the mirror
Put the helmet on first and adjust it the way you actually ride: level on your head, straps snug, retention system set, and glasses or sunglasses in place. If you position the mirror while the helmet is sitting on a table, the angle can be completely wrong once it is on your head.
This is especially important for riders who wear a cap, winter liner, or different eyewear depending on the season. A setup that clears bare temples in summer may press against thicker glasses arms or a cap brim later.
Secure the mount as directed
Attach the mount exactly as the product requires. For adhesive bases, clean the area, let it dry, press firmly, and respect the curing time. For clips or straps, tighten them enough to resist movement without crushing or distorting any part of the helmet.
- Do not ride immediately if the adhesive needs time to bond.
- Do not force a flat mount onto a sharply curved shell.
- Do not modify the helmet unless the helmet maker clearly allows it.
Aim the mirror toward the road behind you
Start in your normal riding posture, not standing upright in the hallway. Look forward, shift only your eyes toward the mirror, and adjust until you can see the lane or path behind and just outside your shoulder.
- Wear the helmet and glasses you normally use.
- Sit on the bike in your usual position.
- Keep your head facing forward.
- Move the mirror in small increments.
- Check that cars, riders, or path users appear behind you, not above you.
The goal is a useful warning view, not a wide panoramic image. If you keep chasing a perfect view, you may end up placing the mirror where it blocks too much forward vision.
Check that your forward view stays clear
The mirror should sit in peripheral vision and disappear mentally when you are not using it. If you have to look around it to see traffic lights, road debris, parked-car doors, or riders ahead, it is too intrusive.
A simple test works well: ride slowly in a traffic-free place and scan ahead as if you were approaching an intersection. If the mirror keeps pulling your attention or covering something important, adjust the arm or try a different mounting point.
Practice scanning in a traffic-free area
Use a quiet parking lot, empty street, or open bike path for the first practice session. Work on quick glances, then return your eyes forward immediately. The useful habit is not staring into the mirror; it is checking, confirming, and moving on.
- One-second glances: long looks are distracting.
- Tiny head movements: large turns can throw off the view.
- Distance checks: learn how close riders and cars appear in your mirror.
- Blind spots: notice what the mirror does not show.

How to use a helmet mirror in traffic
Once adjusted, the mirror should become part of your normal traffic routine: quick glance, forward attention, direct check when needed. It helps you notice patterns earlier, but it should never be treated as proof that the space beside you is clear.
Keep mirror glances brief
Treat the mirror like a quick status check. A short glance can tell you whether a car is closing fast, another cyclist is about to pass, or the lane behind you is temporarily open. Your eyes should return to the road ahead right away, especially near junctions, driveways, parked cars, and pedestrians.
Look over your shoulder before changing position
Use the mirror first, then confirm with a shoulder check before moving left, changing lane position, avoiding an obstacle, or turning. Small mirrors have blind spots, and a rider or vehicle can sit outside the reflected area.
On a quiet neighborhood ride, the mirror may mostly be a comfort tool. On a fast road with frequent overtakes, it becomes an early-warning tool, but the shoulder check is still the final confirmation before you change your line.
Pull over before making adjustments
If the mirror droops, vibrates, or points at your shoulder, stop somewhere safe before fixing it. Re-aiming a small mirror while moving takes focus away from steering and traffic, and it often takes one hand off the bars at the worst moment.
Constant adjustment is a warning sign. The mount may be loose, the arm may be too flexible, or the mirror may simply be a poor match for your helmet.
Check the mount and alignment before each ride
A ten-second check before rolling out can save a lot of annoyance later. Make sure the mount is secure, the arm is not cracked, the mirror is clean, and the angle still matches your riding posture.
- After storage: helmets tossed in bags often get bumped.
- After hot weather: adhesive mounts may deserve an extra look.
- After travel: car trunks and racks can knock the mirror out of line.
Conclusion
A helmet mirror is a good choice if your helmet can hold it securely, you ride where rear awareness matters, and you are willing to practice short controlled glances. If you want the simplest possible setup, a handlebar mirror may be easier; if you want a view that follows your head and keeps your bars clear, a helmet-mounted option can be worth the adjustment period.